Sunday, February 17, 2013

Peanut Butter Chocolate Chip Muffins


I'm sorry for being MIA over here. School got the best of me last week, but I am ready to tackle whatever it throws at me next! So long as I can do it while shoving muffins (and let's be real, spoonfuls of peanut butter) down my throat.

I kid you not, I think I am addicted to peanut butter. I eat it on any and everything. Kid.You.Not. It's kind of scary. I really need an intervention. BUT I CAN'T STOP. And I won't. So there. I even have a board entirely dedicated to peanut butter on my Pinterest. Not sorry.

I have had my eye on these Peanut Butter Chocolate Chip Muffins for quite some time, but for some reason have never made them. I don't know what's wrong with me. I think it's just that anytime I buy jars of peanut butter, I devour them in approximately 12 hours and never have enough leftover for baking. Luckily, that all changed when I saw that my family had two jars of peanut butter in our pantry - one for baking, and one for reserves. It was perfect.

I made a batch of these for my best friend, Nick, and my sister, Kelley. While I did give these away, you better believe I snagged a couple for my self (oops). All I can say is that you CANNOT beat the peanut butter chocolate combo. You just can't. If you can't tell from this, this, thisthisthis, this, OR this, I will forever be loyal to PB & chocolate (hehe).

These are a perfect breakfast treat AND they double as a fabulous dessert. Or snack. Basically what I'm saying is that you can eat these whenever you want and your taste buds will sing songs of joy. That's a verified fact. So go ahead and enjoy!

Brown Sugar Bliss.

Choosy bakers choose Jif.
Yes. Just yes.
Gettin' all melty up in here.
Melted butter + peanut butter...I'm diving in this bowl.
Here comes the chocolate.
Sprinkle 'em with sugar. Every good muffin comes with a coating of sugar. It's a law.
Oven-worthy.
Hello, lover.
Devour.
Peanut Butter Chocolate Chip Muffins
Recipe from Annie's Eats (originally adapted from Baking Bites)
  • 2 1/4 cups all-purpose flour
  • 2 tsp. baking powder
  • 1/2 tsp. salt
  • 2/3 cup brown sugar
  • 6 tbsp. butter, melted and cooled
  • 1/2 cup peanut butter (I used Jif Creamy)
  • 2 large eggs
  • 1 cup milk
  • 3/4 cup chocolate chips
  • coarse sugar for sprinkling (optional)
Directions
  1. Preheat oven to 375 degrees F. Line a muffin pan with 12 paper liners.
  2. In a medium bowl, whisk together the flour, baking powder, salt and brown sugar. Set aside.
  3. In a large bowl, whisk together the melted butter, peanut butter, eggs and milk until smooth. Add in the flour mixture and stir until just combined. Stir in chocolate chips.
  4. Divide batter evenly between prepared muffin tins, filling each to the top. Sprinkle each muffin with coarse sugar, if preferred.
  5. Bake muffins for 17-20 minutes or until a toothpick inserted in the center comes out clean. Allow to cool for 5 minutes in the pan, then remove to a wire rack to cool completely.
I linked up this post at: Inside BruCrew Life, Zent Mrs. & The Mr., Hungry Little Girl, Back for Seconds, Semi Homemade Mom, Buns In My Oven, Mandatory MoochSassy Little Lady

Monday, February 4, 2013

Strawberry Cake Batter Blondies


Sorry about the picture overload, but I could not get over how cute these Blondies were! I made Cake Batter Bars over the summer (excuse those TERRIBLE pictures) and they were honestly one of the greatest desserts I've ever tasted. I am OBSESSED with Funfetti and Cake Batter desserts (see here for more), so making an ooey, gooey cake batter pastry always sounds like a good idea to me.

I was itching to make a Valentine's Day themed dessert and I immediately thought about what I could make with strawberry cake mix. I LOVE strawberry cake, but I don't think it ever gets the glory it deserves. All too often, strawberry cake mix is left behind on the shelf in favor of chocolate or yellow. I decided to change all this. Your time has come strawberry cake. You deserve it.

I wasn't in the mood to whip up a traditional cake, though, and my mind was being drawn to Sally's Baking Addiction's Cake Batter Blondies. While I didn't use her recipe when I originally made my Cake Batter Bars, I knew I wanted to try it because I am obsessed with her blog! I mean, first of all, the layout is adorable and secondly, every single one of her recipes leave me salivating. She is a baking genius I tell you!

These treats are simply to die for. They have a similar texture to my Chocolate Chunk Blondies in that they are almost buttery and melt in your mouth. They are moist (everyone loves that word, right?) with the perfect strawberry flavor. Plus, you get a little crunch and vanilla-y love with the white chocolate chips. While I didn't add any sprinkles into my mix, you certainly could! I do recommend garnishing yours with these cute little heart sprinkles I found at Target to get in the Valentine's spirit.

So, whether you'll be celebrating with that special someone or alone eating chocolate and watching "He's Just Not That Into You" (guilty of the latter), you should add these Strawberry Cake Batter Blondies to your February 14th plans. I promise they'll be the perfect date. Enjoy!


Strawberry Cake Batter Blondies
Recipe slightly adapted from Sally's Baking Addiction
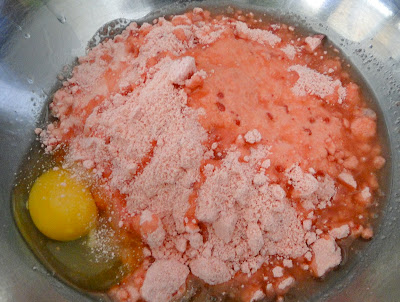
  • 1 box strawberry cake mix
  • 1/4 cup canola oil
  • 1 egg
  • 1/3-1/2 cup milk
  • 3/4 cup white chocolate chips + 1/2 cup for drizzling (if you desire)
Directions
  1. Preheat oven to 350 degrees F. Spray an 11x7 inch baking pan with nonstick spray. Set aside.
  2. Combine first four ingredients in a large bowl. Add the milk slowly. You want the cake batter to be as dense & thick possible. Mix in the white chocolate chips.
  3. Pour the batter into the prepared baking pan and bake for 25-30 minutes until edges are just turning brown. 
  4. Allow to cool for at least 30 minutes so the center sets, then melt your white chocolate chips (I used the microwave) and drizzle them on top of the bars, if you choose. Once the bars and the melted chocolate have cooled, cut your blondies using a serrated knife. 
***The blondies will look like they are not fully done because the center will be quite gooey, but that's what you want! After about 30 minutes of cooling, they will be easy to cut using a serrated knife.

I've linked this post up over at ZentMrs & The Mr, Inside BruCrew Life, Hungry Little GirlBuns in My OvenSemi Homemade Mom