Friday, July 27, 2012

The Ultimate Cookie Cup


After a busy week, I am finally back with a new recipe post! Phew!

On Fridays, after working all week, all I want to do is relax at home alllllll night with nothing to do. However, this past Friday the Olympics started (obviously - GO Team USA!) and I suddenly felt the urge to bake. Nothing like creating fattening treats to shovel down my throat while watching some of the most fit people waltz around my TV screen...HELP ME. 

I honestly wish I could be an Olympic athlete, but anyone who knows me realizes that this is clearly NOT possible. I have the coordination and athletic ability of a one-legged chicken. My parents even predicted my future athletic abilities at a young age...

3rd place...ugh.
While I may not ever participate in the Olympics (sigh), I will be spending every free moment I have until August 12th watching the games and I am THRILLED about this. This whole "once every four years" thing is such a tease...but makes it all the more exciting.

So I urge you all, as you too watch the Summer Olympics, to do it with one (or 5) of these Ultimate Cookie Cups in your hand. The recipe is insanely simple, all you need is pre-packaged cookie dough and peanut butter cups. You could opt to make your own dough if you like (1 tbsp. portions), but that may detract from your time spent staring at Ryan Lochte...

Enjoy these cookie cups and the 2012 Summer Olympics! Yahoo!

The Ultimate Cookie Cup (makes 24 cookie cups)
Recipe from Cookies and Cups
  • 1 package Ready to Bake Sugar Cookie Dough (makes 24 cookies), room temperature
  • 1 package Ready to Bake Chocolate Chip Cookie Dough (makes 24 cookies), room temperature
  • 24 full-sized peanut butter cups
Directions
  1. Preheat oven to 350 degrees F.
  2. Let your cookie dough sit out of the refrigerator for approximately 30 minutes. If it is room temperature, it will be easier to spread around your peanut butter cup.
  3. Line a muffin tin with cupcake liners.
  4. Place one portion of your sugar cookie dough on the bottom of the peanut butter cup, spreading completely over the bottom. Place one portion of your chocolate chip cookie dough on top of the peanut butter cup, spreading to cover top of the peanut butter cup. Make sure that the entire peanut butter cup is covered.
  5. Place in liners and bake for 13-15 minutes.
  6. Let cool in muffin pan for 10 minutes and then transfer to a wire cooling rack to continue cooling.
So easy - love it!
Try to avoid eating all of these before baking. It ain't easy...

Now cover the whole peanut butter cup!!

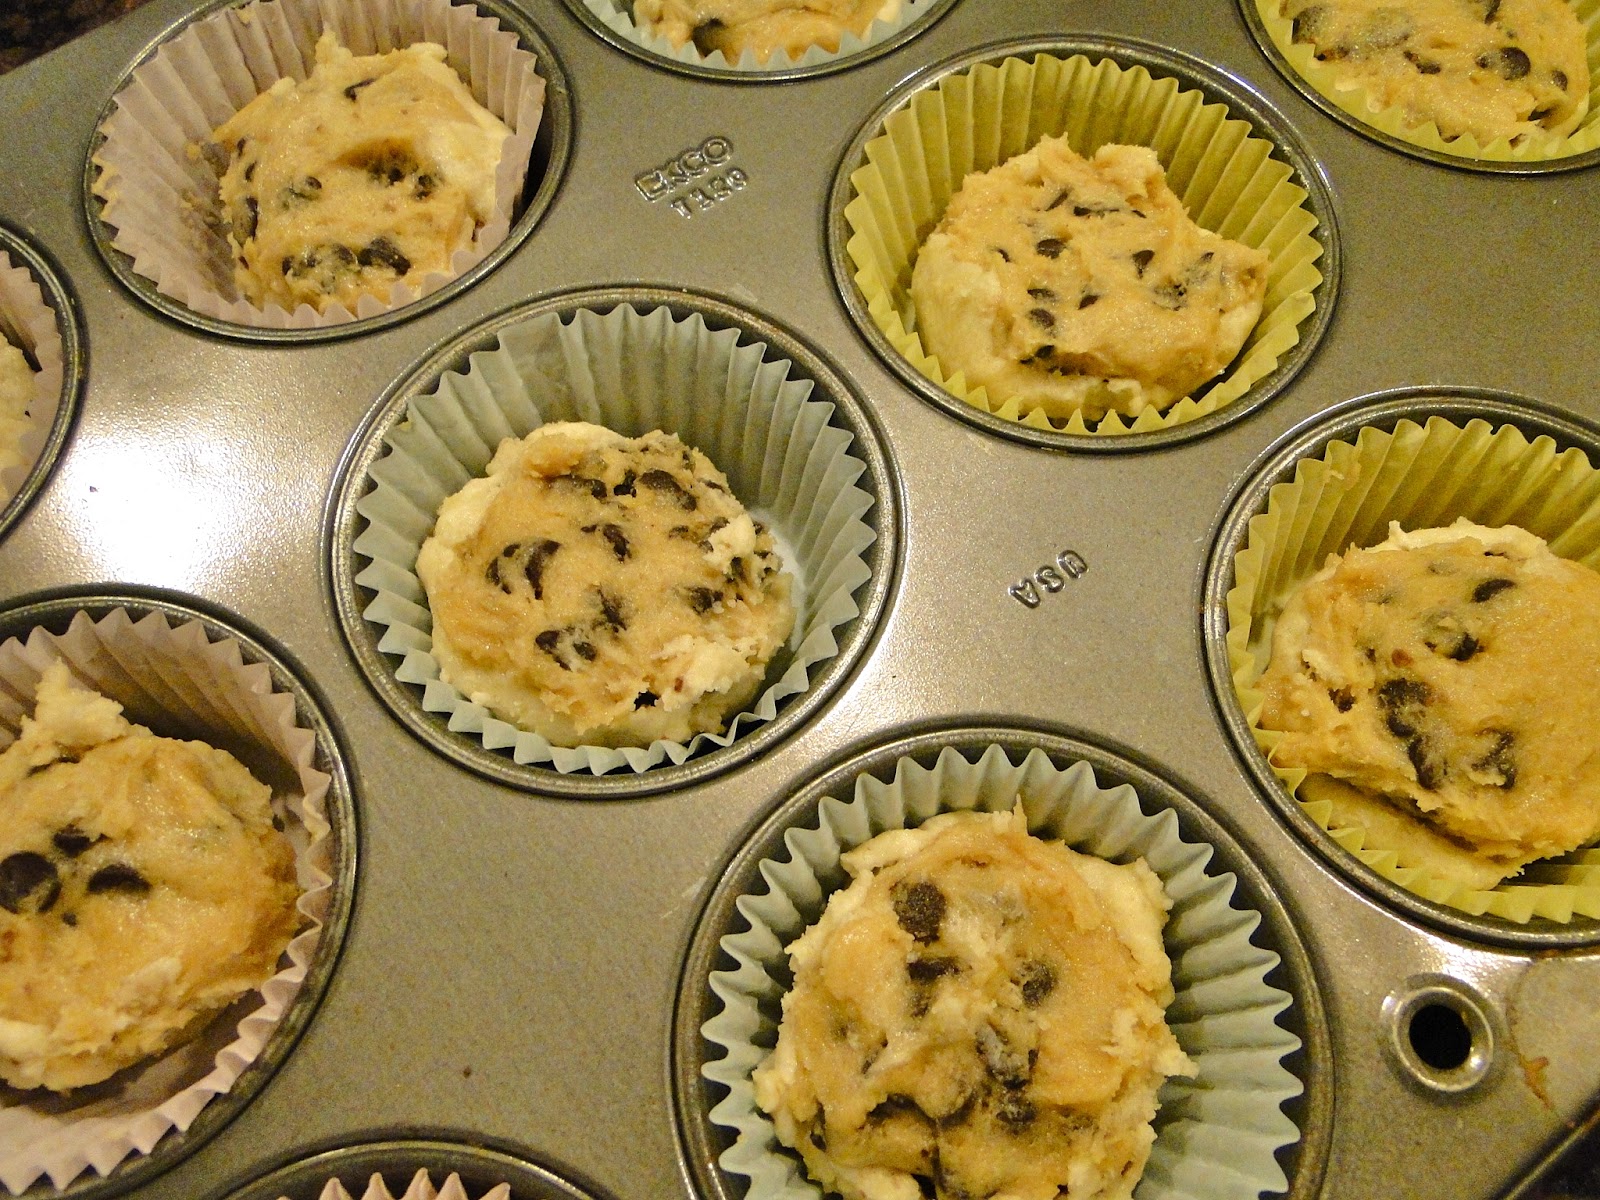
It's tempting to eat all 24 raw...believe me!!!
DEVOUR.


Tuesday, July 24, 2012

Chocolate Chip Cookie Dough Brownies


My sister, Kelley, has been asking (begging?) me to make a dessert specifically for her for quite some time. Because my older sister is such a tiny and adorable human being, I decided to grant her request...it was only fair.

I must say I'm a little bit of a bossy younger sister (whoops) so I did require Kelley to scour the internet for a dessert recipe for me to make for her. After many long hours on Pinterest (everyone's guilty pleasure), Kelley came across these Chocolate Chip Cookie Dough Brownies from the Brown Eyed Baker. This site features so many fantastic recipes that will leave you drooling, and we knew these would be incredible. 

Obviously, chocolate chip cookie dough is one of life's delicacies. Who doesn't love to devour cookie dough? Answer: no one. The greatest part of this cookie dough is that it is eggless AKA no fear of salmonella - Hallelujah! Greatest. News. Ever. And when you top dense, fudgey chocolate brownies with cookie dough, I mean come on, it's a no brainer, it WILL be delicious.

Kelley, like any normal human being, loved these. Just like peanut butter and chocolate, brownie and cookie dough is a match made in heaven. This should be happening in your kitchen ASAP. Nom away, friends.

Chocolate Chip Cookie Dough Brownies
Recipe from Brown Eyed Baker

     Brownie:
  • 4 oz. unsweetened chocolate, finely chopped
  • 1 cup unsalted butter, room temperature
  • 2 cups light brown sugar
  • 4 eggs
  • 2 tsp. vanilla extract
  • 1 cup all-purpose flour
     Cookie Dough:
  • 3/4 cup unsalted butter
  • 3/4 cup light brown sugar
  • 3/4 cup granulated sugar
  • 3 tbsp. whole milk
  • 1 1/2 tsp. vanilla extract
  • 1 1/2 cups all-purpose flour
  • 1 1/2 cups mini chocolate chips
Directions
  1. Prepare the Brownies: Preheat oven to 325 degrees F. Line a 13x9 inch pan with foil, with enough to hang over all four sides. Butter the foil. In a medium glass (microwave safe) bowl, melt the chocolate in the microwave in 30-second increments, stirring after each, until melted and smooth. Set aside to cool slightly. In a large mixing bowl, mix the butter and brown sugar with an electric mixer on medium speed until light and fluffy. Beat in the eggs and vanilla extract, scraping the bowl as needed. Mix in the melted chocolate until combined. Reduce the speed to low, add the flour and mix just until combined (don't over mix!). Spread the batter in the prepared pan. Bake 25 to 35 minutes, or until a toothpick inserted into the center comes out clean. Let cool completely.
  2. Prepare the Cookie Dough: In a medium bowl, use an electric mixer on medium speed to combine the butter and both sugars. Add the milk and vanilla and mix until just combined. Using a rubber spatula or a wooden spoon, stir in the chocolate chips.
  3. Spread the cookie dough over the cooled brownies. Refrigerate until the dough is firm, about one hour. Use a sharp knife to cut the brownies and store them in an airtight container at cool room temperature or in the refrigerator.

Wednesday, July 18, 2012

Spinach & Smoked Gouda Penne Bake


This past weekend, I visited my wonderful friends who are up in Chapel Hill for the summer. It was a great weekend that included a shopping trip with some lovely girlfriends (holler atcha Hannah and Bushman), Sweet Frog Frozen Yogurt (THE BEST), and a trip to the driving range with my boyfriend. I packed a lot into a couple of days and it made me all the more excited to get back to school for a new semester!

Over the weekend, I went to three classic restaurants in Chapel Hill and ate my heart out. I dined on my favorite veggie wrap at Spanky's Friday night, ate a drool-worthy sandwich at Sutton's on Saturday for lunch, and  enjoyed Sunday morning brunch at Breadman's. Like someone pinch me...total food heaven.

God Bless Sutton's Drug Store.
In order to not feel TOTALLY guilty about my food consumption AND to save money (I'm a broke college student 4 realz), I brought up a pasta bake so that one of my weekend meals would be taken care of.

This colorful dish is filled with tons of fresh spinach, bell pepper, garlic, and tomatoes, and it's all topped with lots of smoked gouda...YUM. It's healthy and delicious all in one. And more importantly for many, it's super easy to make and is a great meal to throw together in a pinch and serve alongside a simple salad.

When my mom found this recipe in our local newspaper, it quickly became a family favorite. Try it out yourself and I am sure you won't be disappointed!

Spinach & Smoked Gouda Penne Bake
  • 2 tbsp. (approx.) extra virgin olive oil
  • 1/2 small/medium yellow bell pepper, finely chopped
  • 2 cloves of garlic, minced
  • 1/4 onion, finely chopped
  • 1 (28 oz.) can diced tomatoes with basil and oregano
  • 1 (6 oz.) bag washed baby spinach
  • 1 (12-16 oz.) box penne pasta
  • 8 oz. smoked gouda cheese, shredded
Directions
  1. Boil the pasta in salted water according to package directions, drain, and keep warm.
  2. Prepare 13x9 lightly greased glass casserole dish and pre-heat the oven to 350 degrees F. 
  3. In a deep skillet pour in the olive oil (approximately 2 tablespoons or 2 turns of the skillet) and turn on medium-high heat.
  4. Add the onion to the skillet and allow to cook for about two minutes, constantly stirring. Next, add the minced garlic and again, allow to cook for about two more minutes, stirring. Add in the yellow pepper, repeating the same steps to cook until the vegetables are softened.
  5. Next, add the diced tomatoes.  Reduce the heat to low-medium and cook vegetable mixture together for about 5 minutes.  
  6. Turn the heat off and add spinach, a little bit at a time, allowing to wilt.  Add vegetable mixture to the cooked pasta, and toss with 1/2 of the shredded gouda cheese.
  7. Pour pasta concoction into greased casserole dish and sprinkle remaining shredded gouda over the top.
  8. Cook in prepared oven for about 15 minutes, or until cheese is melted - ENJOY!


Monday, July 16, 2012

Twix Blondies


You know what is pure evil? The strategic placement of candy bars next to the checkout lines at the grocery stores/Target/everywhere. Seriously. There's nothing harder than resisting the impulsive urge to purchase and devour a Peanut Butter Snickers or a Milky Way, just to name a phew. I hope many of you are nodding in agreement...cause it's tough.

Sometimes, life demands that we consume candy bars. We all know it's true. I mean, there is often no better medication than chocolate. Can't deny that.

So, I present to you Twix Blondies. Thanks to this recipe from Cookies and Cups, you can indulge in nearly 40 mini Twix at once (well, in one pan). These are a perfect blend of caramel, chocolate, and buttery, blondie goodness and will therefore satisfy all your sweet cravings.

Do yourself a favor this week and pick up 2 bags of mini Twix, chop 'um up, and make these blondies. Indulge and savor this chocolatey, caramel goodness.


Twix Blondies
Recipe from Cookies and Cups

  • 3/4 cup butter, melted
  • 2 1/4 cup packed brown sugar
  • 3 eggs
  • 2 1/2 cup all-purpose flour
  • 2 tsp. baking powder
  • 1 tsp. coarse sea salt
  • 30 mini Twix bars coarsely chopped + 9 mini Twix bars (reserved for garnish) more finely chopped 
  • 1 cup semi-sweet chocolate chips
  • 1 tsp. vanilla
  • 1/2 cup melted chocolate chips for garnish
Directions
  1. Preheat oven to 350 degrees F. Grease a 13x9 baking pan.
  2. In a medium-sized bowl, combine flour, baking powder, and salt, whisking together.
  3. In a mixing bowl, combine butter, brown sugar, and vanilla on low speed until smooth.
  4. Add eggs one at a time, continuing on low speed.
  5. Slowly add the flour mixture to the butter mixture until just combined.
  6. Add the coarsely chopped Twix and chocolate chips, stirring in with a wooden spoon.
  7. Spread batter into prepared pan and bake approximately 25-30 minutes until they are set. Toothpick will come out slightly gooey. Be careful not to overcook.
  8. When removed from oven, sprinkle reserved Twix on top and drizzle with melted chocolate.
  9. Cool in pan for 2-3 hours or overnight. Don't cut the bars until they are completely cooled or you'll have a big mess!


Thursday, July 12, 2012

Chickpea and Tomato Salad with Fresh Basil

Colorful and wonderful!
Last Friday, my best friend, Nick, and I cooked a delicious and fresh summer dinner for my parents. My dad just had surgery and my mom has been extremely busy, so we thought we would try out some recipes and help them out all in one.

Our menu consisted of marinated grilled chicken (using Newman's Lite Caesar Dressing for marinade), oven-roasted asparagus (olive oil, salt, pepper), and warm, buttery rolls, but the star of the show was this Chickpea and Tomato Salad with Fresh Basil.

The recipe for the salad attracted my eye on Pinterest (thanks for pinning it, Alexandra!). I'm seriously obsessed with the site and feel so accomplished when I create something off of it...my life is very sad. That being said, it tasted every bit as good as the picture online looked.

All four of us diners couldn't help but dive in for seconds and much to my pleasure (and slight dismay), there were no leftovers! This side dish is super simple, extremely health, and so fresh. It is absolutely the perfect, light summer side dish.

Chickpea and Tomato Salad with Fresh Basil
Recipe from Green Lite Bites

  • 1 can chickpeas, drained and rinsed
  • 1 pint grape tomatoes, halved
  • 25 large basil leaves, chopped
  • 3 cloves of garlic, minced
  • 1 tbsp. red wine vinegar
  • 1 tbsp. apple cider vinegar
  • 2 tsp. olive oil
  • 1/2 tbsp. honey
  • pinch of salt
Directions

  1. Toss all ingredients together in a medium serving bowl.
  2. Chill for at least 20 minutes, allowing all the flavors to merge.
  3. Eat and Enjoy!

The complete meal.

Thanks for manning the grill, Nick!
Roasted to perfection.

Monday, July 9, 2012

Summer Fruit Pizza


One of my favorite holidays, Fourth of July, just passed. I love the Fourth of July. I love it because it is smack dab in the middle of my favorite season (summer, duh) and it celebrates my favorite place ever, the U S of A. I love the sunshine, pool time, and fireworks. You can't beat it, folks.

Obviously, I also love the food served on the Fourth of July: cheeseburgers, baked beans, corn on the cob, watermelon...I am hungry just thinking about all of it. But you can't have a proper Fourth of July celebration, or any summer cookout for that matter, without a delicious dessert. You just can't. Of course you can have apple pie (yum) but at my house, we are all about the fruit pizza.

This fruit pizza is to die for. A light and flaky homemade pie crust topped with a fluffy cream cheese layer and sprinkled with all the fresh and delicious fruit summer has to offer (my mom and I tried to decorate our fruit in a fireworks display - can't quite say we succeeded...)

I love that this dessert is a different take on the traditional pie or tart and is always well-received by friends and family, who always ask for seconds. This is a definite summer must!

Summer Fruit Pizza
  • 2 cups all-purpose flour
  • 1/2 cup powdered sugar
  • 1 cup butter or margarine, cut into pieces
  • 1 pkg. (8 oz.) cream cheese, softened
  • 1/2 cup granulated sugar
  • 1 tsp. vanilla
  • 3-4 cups assorted fresh fruit (of your choice)
  • 1/4 cup apple jelly, melted
Directions

  1. Combine flour and powdered sugar; cut in butter until mixture is crumbly. Pat mixture on lightly greased 12-inch pizza pan; bake at 350 degrees F until browned, 8-10 minutes. Cool.
  2. Beat cream cheese, granulated sugar, and vanilla until fluffy; spread over crust.
  3. Arrange fruit on cream cheese; brush with jelly to preserve fruit. Enjoy!


Thursday, July 5, 2012

Peanut Butter M&M Marshmallow Cookies


Is there anything better than Peanut Butter M&M's? Maybe, but I would argue against it. They are just too darn good. I mean, you cannot beat that peanut butter chocolate flavor. Yum.

When I first saw this recipe, I was a bit skeptical about the addition of marshmallows, but a peanut butter cookie loaded with peanut butter M&M's...I just couldn't pass it up. Thank God I didn't.

Not only are these cookies super easy to make, they are super colorful and fun cookie to indulge in. They are different, I mean have you ever had a peanut butter cookie with peanut butter M&M's and marshmallows? Didn't think so. But let me tell you, different does not mean bad.

These cookies have been enjoyed by every member of my family. My mom loved them, even though she hates marshmallows, my dad has been enjoying them as he recovers from surgery, my sister munched a couple during the Bachelorette (SEAN OR JEF OR ARIE, Y'ALL?!), and my wonderful friend Nick said they melted in his mouth. Proof enough that these need to be in your cookie jar.

These are a sweet that will satisfy every type of sweet craving. You should go bake these. Like now.


Peanut Butter M&M Marshmallow Cookies
Recipe adapted from Sweet Treats & More
  • 1/2 cup butter, softened
  • 1/2 cup granulated sugar
  • 1/2 cup brown sugar 
  • 1/2 cup peanut butter
  • 1 egg
  • 1 tsp. vanilla
  • 2 tbsp. milk
  • 1 3/4 cup all-purpose flour
  • 1/2 tsp. salt
  • 1 tsp. baking soda
  • 1 cup Peanut Butter M&M's
  • 3/4 cup mini marshmallows
Directions

  1. Preheat oven to 350 degrees F.
  2. In a medium bowl, combine flour, salt, and baking soda and set aside.
  3. In the bowl of a stand mixer, beat butter until smooth. Beat in peanut butter, then sugars.
  4. Add egg, vanilla, and milk and beat until smooth. Slowly add dry ingredients to wet ingredients.
  5. Lastly, gently stir in Peanut Butter M&M's and mini marshmallows.
  6. Place rounded tablespoons of cookie dough onto baking sheets lined with parchment paper. Bake for 8-10 minutes. Let cool for a few minutes before moving to a cooling rack. (Don't worry if you have oozing marshmallows! They may be messy but they taste delicious!)
That dough. Too good.