Tuesday, August 21, 2012

Buffalo Chicken Burgers


Uhhh...it's not actually August 21st, I didn't just turn 20, and today is definitely not the first day of my junior year at UNC Chapel Hill. Nope. None of that is happening because that would mean that time is passing outrageously quickly and I just can't deal with that. Sorry 'bout it.

While I am sad that time is flying right before my eyes, I was very pleased about how quick and easy these burgers were to make. Not to mention they were delicious AND healthy - the ultimate combo. While I love turkey burgers, I think I may have just found a new and greater love for chicken burgers. Even my dad enjoyed these (the photos are proof!) and the men I know are not usually a fan of burgers unless they are made of red meat meaning these are scrumptious.

These burgers are perfect for college students with tight budgets and even tighter schedules, busy families on the go, football tailgaters, and anyone looking for a new and delicious dinner recipe - everybody wins! The burgers pack a little taste great topped with ketchup, ranch dressing, or even more hot sauce! They are a fun alternative to your typical burger and will spice up the end of your summer (punny). Enjoy!

Buffalo Chicken Burgers (makes 4 small burgers)
Recipe from Peanut Butter Fingers
  • 1 lb. ground chicken
  • 1/4 cup Franks Red Hot Buffalo Wing Sauce
  • 1/4 cup parmesan cheese (we used the canned variety to make the patties stick together)
Directions
  1. Combine all ingredients in a bowl and form four patties from the mixture. The patties will be more "wet" than typical burger patties, but that's ok!
  2. On the grill, cook burgers for about 8-10 minutes on each side on medium heat. Or, if using a skillet, cook for about 7 minutes on each side on medium/high heat.
  3. Top with muenster or provolone cheese and enjoy!
I shared this post at Taste and Tell

Monday, August 13, 2012

Whole Wheat Peanut Butter Banana Pancakes


To say I love pancakes may be an understatement. I adore them. I obsess over them. I could eat them all the time (wait, didn't I just say that about cereal?!). It's safe to say I'm a breakfast food fanatic.

I must admit that I usually just whip out a box of pancake mix, add some water, do some flippin', and devour. But, as I am currently recovering from surgery of my own, I have been on a baking spree. I hear it helps people heal more quickly...or something like that.

When I went grocery shopping for those Reese's Cheesecake Brownies, I picked up some Reese's Peanut Butter Chips (think chocolate chips but, well, peanut butter!) while I was at the store hoping I'd be inspired to create something fun.

Inspiration came in the form of these Whole Wheat Peanut Butter Banana Pancakes. I have been craving a nice stack of pancakes for weeks now, and when I saw we had some quite ripe bananas, I knew these needed to be used to kick my traditional buttermilk pancakes up a notch.  THEN, it hit me. Banana Pancakes + Reese's Peanut Butter Chips = heaven in my mouth. I knew I had to experiment.

I love the banana/peanut butter combo (one of my fave snacks) and these pancakes are a wonderful mix of the two. The pancake recipe itself comes from the blog 100 Days of Real Food Blog (natural ingredients!) and is dense yet fluffy, and super moist. Then when you add the peanut butter chips, you essentially have peanut butter banana bread...in a pancake form...covered with syrup. You could substitute the chocolate chips for the peanut butter chips if you so desire, and these would still be amazing. I got 10 generously sized pancakes out of this recipe, so be prepared to feed a crowd (or freeze the leftovers).

Move over Jack Johnson, you've been upstaged. Enjoy!

Whole Wheat Peanut Butter Banana Pancakes
Recipe adapted from 100 Days of Real Food

  • 2 cups whole-wheat flour
  • 2 tsp. baking powder
  • 1 1/2 tsp. baking soda
  • 1/2 tsp. salt
  • 1 tbsp. honey
  • 2 large eggs, lightly beaten
  • 1 3/4 cups milk
  • 2 tbsp. unsalted butter, melted
  • 2 ripe bananas, mashed
  • 3/4 cup Reese's Peanut Butter Chips (like chocolate chips!)
Directions

  1. In a large bowl, whisk together the flour, baking powder, baking soda, and salt.
  2. Make a well (hole) in the center of the flour mixture and pour in the honey, eggs, milk, and 2 tablespoons of melted butter. Whisk together thoroughly, but do not overmix.
  3. Gently fold the mashed bananas and Reese's Peanut Butter Chips into the batter with a spatula. 
  4. Heat a griddle or saute pan over medium-high heat. Coat the pan with cooking spray, or swirl enough butter around the pan until it is well coated. Add pancake batter using a soup ladle.
  5. When the pancakes have begun to brown on the bottom, flip them over to cook the other side.
  6. Serve with warm maple syrup and a side of fruit. Don't forget to freeze the leftovers!

Friday, August 10, 2012

Reese's Puffs Mallow Bars


I have a confession: if I could, I would eat cereal for every meal. Ah, so glad I got that off my chest. Kind of a shameful admission from a professed foodie, but it's the truth. I love cereal, it nearly never fails me.

For breakfast, I almost always have some variety of Special K cereal with milk, and during the summer I've been topping it off with fresh berries...

Alright, I'm hungry.
While I love starting off my day with cereal, I also love having a bowl for dessert after dinner. Weird? Whatever. I recently purchased a box of Reese's Puffs to have as my dessert cereal. Y'all, Reese's Puffs are addictive and dangerous. WATCH OUT. They are so good and even though they probably contain as much sugar as their Reese's cup counterparts, I somehow feel better eating them. Don't poke holes in my logic.

So, to add to this Chocolate Peanut Butter Week, I decided to spice up the traditional Rice Krispie Treat recipe with (drumroll please) REESE'S PUFFS! Wise decision, folks. These are just an upgraded version of Rice Krispie treats in my humble opinion. Marshmallowy, peanut buttery, chocolatey, good...y. Try them for yourself or switch the Reese's Puffs with your favorite "guilty pleasure" cereal!


Reese's Puffs Mallow Bars
Recipe adapted from Kellogg's Rice Krispies

  • 3 tablespoons butter or margarine
  • 1 pkg. (10 oz., about 40) regular marshmallows OR 4 cups miniature marshmallows
  • 6 cups Reese's Puffs cereal
Directions

  1. In a large saucepan, melt butter over low heat. Add marshmallows and stir until completely melted. Remove from heat.
  2. Add Reese's Puffs cereal. Stir until all well coated.
  3. Using buttered spatula or wax paper, evenly press mixture into 13x9x2 inch pan coated with cooking spray. Cool. Cut into 2-inch squares. Best if served the same day.

Wednesday, August 8, 2012

Reese's Cheesecake Brownies


Karly over at Buns in My Oven, one of my favorite blogs to follow, has declared this week to be Chocolate Peanut Butter Week on her blog! Since I love all her posts and recipes, I thought I'd join in on the fun.

I am not a huge chocolate fan (weird, I know), but give me anything with chocolate and peanut butter and I will straight up inhale it. I am a die-hard Reese's fan and have recently been enjoying Peanut Butter M&M's and Peanut Butter Snickers. NOM.

I find that this Chocolate Peanut Butter Week is fitting since it coincides with my birthday week, so I am a very content gal. I think y'all should participate and make some Chocolate and Peanut Butter treats!!

I've had these Reese's Cheesecake Brownies pinned for quite some time, so this week inspired me to make them. These are gooey, rich, and decadent. They are satisfying and filling and most of all LOADED with chocolate and peanut buttery goodness. Brownies, Reese's Pieces, melted chocolate, and Reese's Cups?!! I'm in, and you should be too. Enjoy!

Ingredient line-up (minus the chocolate chips and heavy cream) 
Brownie. Batter.
Fluffy Cream Cheese!!!
Oh my heavens. 
Nearly stuck my face in that little measuring cup.
In they go!
Ready for the oven!
Baked!
Yes please. 
#winning

Reese's Cheesecake Brownies
Recipe from Pip & Ebby

  • 19.5 oz. box chocolate fudge brownie mix
  • 8 oz. cream cheese, softened
  • 14 oz. can sweetened condensed milk
  • 1/2 cup creamy peanut butter
  • 12 oz. package Reese's Pieces candies
  • 12 oz. bag milk chocolate chips
  • 3 tbsp. whipping cream
  • 12 large Reese's peanut butter cups, chopped 
Directions

  1. Preheat oven to 350 degrees F. Lightly coat a 9x13 inch pan with cooking spray.
  2. Prepare the brownie mix according to package directions. Spread the brownie batter in the pan and set aside.
  3. In a large bowl, beat the cream cheese with a hand mixer until fluffy. Add the can of sweetened condensed milk and the 1/2 cup of peanut butter and beat until smooth. Stir in the Reese's Pieces candies.
  4. Spoon the cream cheese mixture over the brownie batter and spread evenly.
  5. Bake for 30-40 minutes (depending on your oven) or until the cheesecake layer is set and the edges are golden brown. Cool for 30 minutes then refrigerate for 30 minutes.
  6. Add the chocolate chips and whipping cream to a small, microwaveable bowl. Microwave on high for 1 minute, or until the chips are melted. Stir until smooth then spread over the cheesecake layer.
  7. Sprinkle the 12 chopped Reese's cups over the top. Store covered in refrigerator. 

Friday, August 3, 2012

Southwestern Quinoa Salad


I seriously cannot believe that it is already August! Didn't I just get home from finals?? Wasn't July 4th yesterday?? Where does time go?!?! I'm excited because August means my birthday and my return to Chapel Hill, but I must say I am not ready for classes! I am in full on summer mode.

I love summer. I always have. I especially love the fresh foods ready to be eaten during the summertime: berries, corn, watermelon, etc. Yum yum yum. With all these fresh foods readily available, and with swimsuit season well upon us (eek.), I love having healthy go to dishes.

This summer, I have fallen in love with the healthy protein-rich and fiber-filled quinoa. I have definitely hopped on the quinoa bandwagon. It is so easy and can be made in a variety of different ways, making it versatile for any meal! With so many recipes floating around, you seriously can't get bored with this stuff.

This dish is packed with black beans, corn, and red bell peppers - nom. The lime juice and cilantro give it a bright, fresh taste and make this, for me at least, a summery dish. This is healthy and filling and pairs well with grilled chicken!

Southwestern Quinoa Salad (makes 4-6 servings)
Recipe from Archer Farms Market
  • 1 cup quinoa
  • 1 (15.5 oz.) can black beans, drained and rinsed
  • 1 (15.25 oz.) can sweet corn, drained OR 2 ears of fresh, cooked corn
  • 1 red bell pepper, diced
  • 1/4 cup cilantro, chopped
  • 3 tbsp. lime juice
  • 2 tbsp. olive oil
  • 2 tsp. ground cumin

Directions

  1. Thoroughly rinse 1 cup quinoa with water. Combine quinoa and 1 and 1/2 cups water in medium saucepan.
  2. Bring to a boil. Reduce heat and simmer, covered, 10 to 15 minutes, until water is absorbed and quinoa is tender.
  3. Remove from heat. Let stand 15 minutes.
  4. Combine beans, corn, red bell pepper, and cilantro in a large bowl. Stir in cooked quinoa.
  5. Combine lime juice, oil, and cumin in a small bowl. Toss with quinoa misture. Season with salt and pepper to taste. Serve warm or chilled (I prefer chilled).

Friday, July 27, 2012

The Ultimate Cookie Cup


After a busy week, I am finally back with a new recipe post! Phew!

On Fridays, after working all week, all I want to do is relax at home alllllll night with nothing to do. However, this past Friday the Olympics started (obviously - GO Team USA!) and I suddenly felt the urge to bake. Nothing like creating fattening treats to shovel down my throat while watching some of the most fit people waltz around my TV screen...HELP ME. 

I honestly wish I could be an Olympic athlete, but anyone who knows me realizes that this is clearly NOT possible. I have the coordination and athletic ability of a one-legged chicken. My parents even predicted my future athletic abilities at a young age...

3rd place...ugh.
While I may not ever participate in the Olympics (sigh), I will be spending every free moment I have until August 12th watching the games and I am THRILLED about this. This whole "once every four years" thing is such a tease...but makes it all the more exciting.

So I urge you all, as you too watch the Summer Olympics, to do it with one (or 5) of these Ultimate Cookie Cups in your hand. The recipe is insanely simple, all you need is pre-packaged cookie dough and peanut butter cups. You could opt to make your own dough if you like (1 tbsp. portions), but that may detract from your time spent staring at Ryan Lochte...

Enjoy these cookie cups and the 2012 Summer Olympics! Yahoo!

The Ultimate Cookie Cup (makes 24 cookie cups)
Recipe from Cookies and Cups
  • 1 package Ready to Bake Sugar Cookie Dough (makes 24 cookies), room temperature
  • 1 package Ready to Bake Chocolate Chip Cookie Dough (makes 24 cookies), room temperature
  • 24 full-sized peanut butter cups
Directions
  1. Preheat oven to 350 degrees F.
  2. Let your cookie dough sit out of the refrigerator for approximately 30 minutes. If it is room temperature, it will be easier to spread around your peanut butter cup.
  3. Line a muffin tin with cupcake liners.
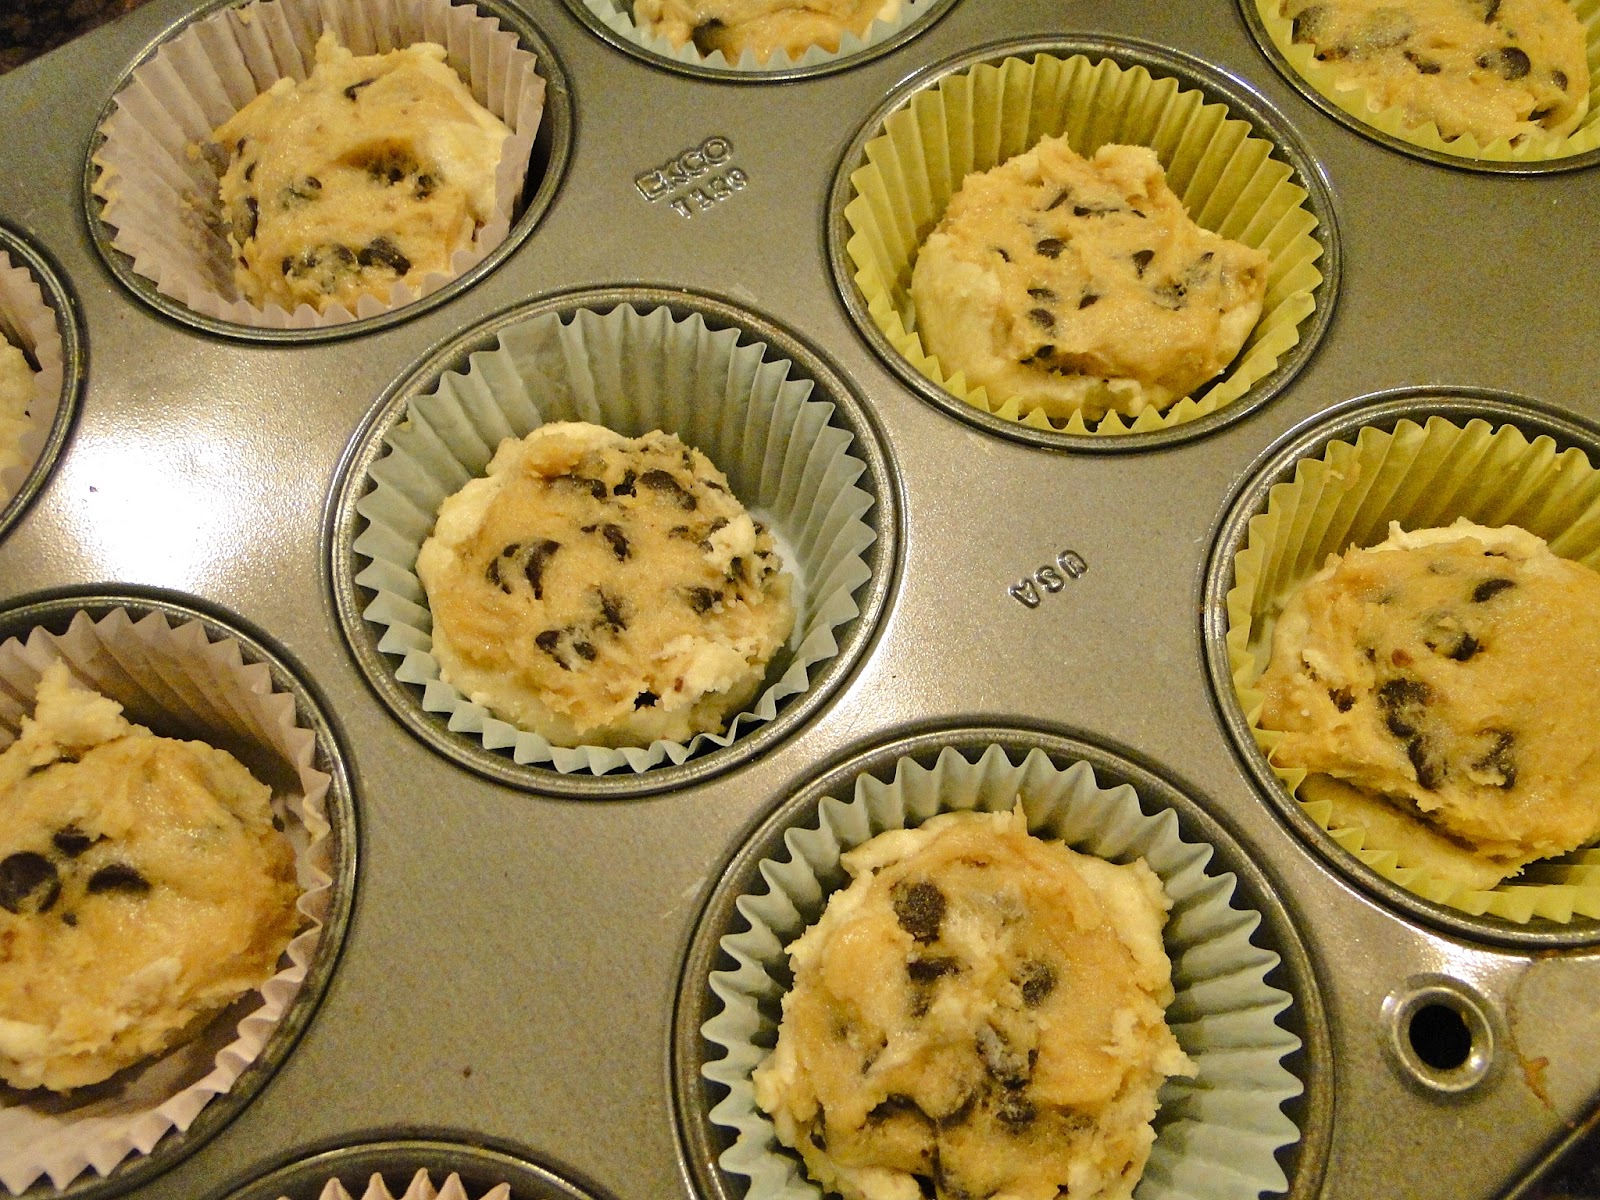
  4. Place one portion of your sugar cookie dough on the bottom of the peanut butter cup, spreading completely over the bottom. Place one portion of your chocolate chip cookie dough on top of the peanut butter cup, spreading to cover top of the peanut butter cup. Make sure that the entire peanut butter cup is covered.
  5. Place in liners and bake for 13-15 minutes.
  6. Let cool in muffin pan for 10 minutes and then transfer to a wire cooling rack to continue cooling.
So easy - love it!
Try to avoid eating all of these before baking. It ain't easy...

Now cover the whole peanut butter cup!!

It's tempting to eat all 24 raw...believe me!!!
DEVOUR.


Tuesday, July 24, 2012

Chocolate Chip Cookie Dough Brownies


My sister, Kelley, has been asking (begging?) me to make a dessert specifically for her for quite some time. Because my older sister is such a tiny and adorable human being, I decided to grant her request...it was only fair.

I must say I'm a little bit of a bossy younger sister (whoops) so I did require Kelley to scour the internet for a dessert recipe for me to make for her. After many long hours on Pinterest (everyone's guilty pleasure), Kelley came across these Chocolate Chip Cookie Dough Brownies from the Brown Eyed Baker. This site features so many fantastic recipes that will leave you drooling, and we knew these would be incredible. 

Obviously, chocolate chip cookie dough is one of life's delicacies. Who doesn't love to devour cookie dough? Answer: no one. The greatest part of this cookie dough is that it is eggless AKA no fear of salmonella - Hallelujah! Greatest. News. Ever. And when you top dense, fudgey chocolate brownies with cookie dough, I mean come on, it's a no brainer, it WILL be delicious.

Kelley, like any normal human being, loved these. Just like peanut butter and chocolate, brownie and cookie dough is a match made in heaven. This should be happening in your kitchen ASAP. Nom away, friends.

Chocolate Chip Cookie Dough Brownies
Recipe from Brown Eyed Baker

     Brownie:
  • 4 oz. unsweetened chocolate, finely chopped
  • 1 cup unsalted butter, room temperature
  • 2 cups light brown sugar
  • 4 eggs
  • 2 tsp. vanilla extract
  • 1 cup all-purpose flour
     Cookie Dough:
  • 3/4 cup unsalted butter
  • 3/4 cup light brown sugar
  • 3/4 cup granulated sugar
  • 3 tbsp. whole milk
  • 1 1/2 tsp. vanilla extract
  • 1 1/2 cups all-purpose flour
  • 1 1/2 cups mini chocolate chips
Directions
  1. Prepare the Brownies: Preheat oven to 325 degrees F. Line a 13x9 inch pan with foil, with enough to hang over all four sides. Butter the foil. In a medium glass (microwave safe) bowl, melt the chocolate in the microwave in 30-second increments, stirring after each, until melted and smooth. Set aside to cool slightly. In a large mixing bowl, mix the butter and brown sugar with an electric mixer on medium speed until light and fluffy. Beat in the eggs and vanilla extract, scraping the bowl as needed. Mix in the melted chocolate until combined. Reduce the speed to low, add the flour and mix just until combined (don't over mix!). Spread the batter in the prepared pan. Bake 25 to 35 minutes, or until a toothpick inserted into the center comes out clean. Let cool completely.
  2. Prepare the Cookie Dough: In a medium bowl, use an electric mixer on medium speed to combine the butter and both sugars. Add the milk and vanilla and mix until just combined. Using a rubber spatula or a wooden spoon, stir in the chocolate chips.
  3. Spread the cookie dough over the cooled brownies. Refrigerate until the dough is firm, about one hour. Use a sharp knife to cut the brownies and store them in an airtight container at cool room temperature or in the refrigerator.